Blog - CockroachDB 22.2 SSO with Azure Managed Identities

Overview:
In this blog post we will be demonstrating how to authenticate and connect to CockroachDB using JWT tokens issued to Azure's Managed Identities. In this example, we will retrieve the JWT tokens from Azure for a test SQL user in CockroachDB and use those for user authentication.
At a high level we will create the following:
- CockroachDB Instance (On a VM)
- Client Virtual Machine (For Testing SSO)
- Azure Managed Identity
- Azure Application
The ID token issued by Azure allows a user to connect to CockroachDB instead of a password. Ideally an application would request a refresh token to request new ID tokens automatically, rather than using CURL in this example. This method can let a user stay authenticated while still ensuring good security practices of rotating tokens, this prevents stale passwords being used.
Prerequisite Setup:
For the prerequisites I will provide links to documentation before moving on to the relevant implementation aspects of the setup. You may have your own method of provisioning the cluster or already have one ready. Please note the version of CockroachDB you need to be running is v22.2.0.
- The first thing we will need to do is provision a Virtual Machine in the Azure Console (or CLI. This can be an Operating System of your choice and will be the example CockroachDB Node that we will set up to use SSO, if you need assistance provisioning a VM please see - https://learn.microsoft.com/en-us/azure/virtual-machines/windows/quick-create-portal.
- Secondly provision your CockroachDB node on the newly created VM following the documentation here - https://www.cockroachlabs.com/docs/stable/secure-a-cluster.html.
Configuring Azure:
To begin configuring Azure, we will need to create a Managed Identity in the Azure Console, managed identities eliminate the need for developers to manage credentials. There are two types of managed identities we can create, system-assigned and user-assigned. The one we need is a user-assigned identity.
- Navigate to the Azure Console
- Search for “Managed Identities”
- Click Create
- Select a resource group, a region and provide a name for your identity.
- Click review + create

Once created you should see the above validation passed screen, we can now move on to the next step.
Now we need to Create an App Registration in the Azure Portal, this allows you to establish trust between a defined application and Microsoft's identity platform, we will use this App Registration for CockroachDB.
- Navigate to the Azure Console
- Search for “App Registrations”
- Click “New Registration”
- Enter a name, leaving supported account types as default and finally enter a Redirect URI, for this we’re just using example.com
- Click “Register”
We now have our registered example in Azure, you will notice we now have some essential objects which will be used later such as Application ID.
Once we have a Managed Identity and an App Registration with no permissions, we need to create another Virtual Machine within Azure that will be the client connecting to our database. Like in prerequisites, create a new virtual machine and install CockroachDB on it, but DO NOT configure and setup the cluster. We will use this as a client only using the CockroachDB CLI. (Once created if using the secure mode you will need to SCP or manually copy the certificates over from the 1st VM in order to connect to the database)
NOTE: You may need to open the ports of the CRDB Server to allow connectivity from this VM if you’re unable to connect.
- In the Azure Portal, assign the above created managed identity to the newly created client VM we will be using to connect to the database.
- Navigate to the VM in the Console
- Click on Identity on the left hand side
- Click “User Assigned” at the top
- Then click add
- Select your managed identity from the list and click Add again.

You should now see the managed identity showing under the user assigned identities page like above. Now we are ready to configure CockroachDB to use this managed identity for authentication from our applications or in this example our secure client.
To begin, SSH into the New Virtual Machine that has the CockroachDB Client installed and has our new identity assigned to it. From here you will be able to retrieve the access token and client ID we will need in the next steps.
- Obtain the access token and client id by running the below:
curl http://169.254.169.254/metadata/identity/oauth2/token?api-version=2018-02-01&resource=<RESOURCEIDOFMANAGEDIDENTITY>' -H Metadata:true -s | jq
You should get similar output to the below image

From this output , we also need to base64 decode the middle section of the access token between the two “.” This will give us the rest of the information we need to set up CRDB for authentication. (You can either copy and paste this in to a base64 decoder online)
That will give you something like the below

Next we need to Configure CockroachDB cluster setup on the first VM to use JWT Authentication. First of all SSH into the VM where the CockroachDB cluster is set up and connect using the cockroach sql command. (NOTE: This is an enterprise feature so you must also populate org/key reach out if you’d like a trial)
cockroach sql --certs-dir=certs/
SET CLUSTER SETTING server.jwt_authentication.enabled=True;
SET CLUSTER SETTING server.jwt_authentication.audience=”<AppID>; (This is the ID of the app registration in the Azure Portal)
SET CLUSTER SETTING server.jwt_authentication.issuers=<https://sts.windows.net/<AAD_tenant_id>
SET CLUSTER SETTING server.jwt_authentication.jwks=<everything from here https://login.microsoftonline.com/common/discovery/v2.0/keys replacing tenant_id with TID from the above screenshot>
You will also need to add “alg”: “RS256” to each key from this webpage, I recommend using a text editor to change this and then pasting it in. (This is a known issue and will be fixed in 22.2.1)
SET CLUSTER SETTING server.identity_map.configuration=”<IDP> <SUB> <Your SQL USER>" (This can be any SQL user, or you can create a new one)
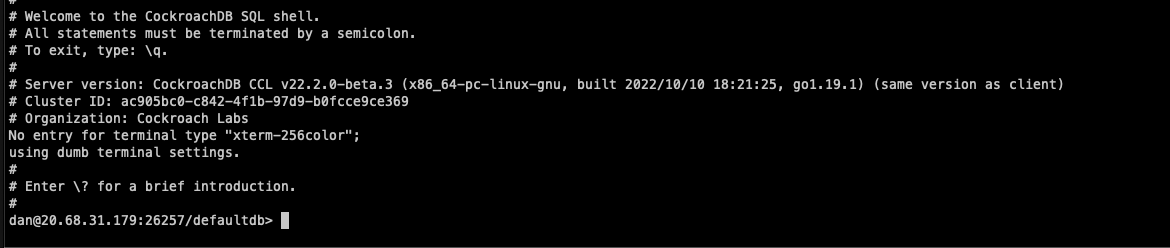
Now CockroachDB is configured to use JWT for authentication. From the Client VM you can connect with the following string.
cockroach sql --url "postgresql://<SQLUSER>:<ACCESSTOKEN>@20.68.31.179:26257?options=--crdb:jwt_auth_enabled=true" --certs-dir=certs/
We have now configured CockroachDB to use Managed Identities within Azure for authentication from our example Client VM, in a real working example you can take this and programme your applications to automatically gather the required tokens and authenticate to your database both securely and password free.