Blog - CockroachDB, Azure Data Lake Gen2 and Synapse

CockroachDB is an Distributed SQL OLTP database which is perfect for supporting critical line of business applications that have scale and resiliency requirements. However, an organization’s data architecture will often contain many tools, including something for transforming, shaping & analyzing data to help inform better business decisions. This means that a line of business database like CockroachDB must be able to integrate with such systems to help customer teams achieve those outcomes for business.
Microsoft Azure is one of the largest cloud providers and has many popular data analytics tools in its portfolio. In this tutorial we will look at how we can send data using change data capture in CockroachDB to one of those services, Azure Synapse.
Azure Synapse Analytics is a limitless analytics service that brings together data integration, enterprise data warehousing, and big data analytics. It gives you the freedom to query data on your terms, using either serverless or dedicated options—at scale. Azure Synapse brings these worlds together with a unified experience to ingest, explore, prepare, transform, manage, and serve data for immediate self service BI and machine learning needs.
If you would like to follow along these are the prerequisites:
- Azure CLI
- An AKS Cluster running CockroachDB (instructions here)
- kubectl if installing the CockroachDB cluster on Kubernetes
- CockroachDB Binary which will be used to setup a cluster in Azure
Step 1: Prepare Your Variables
To standardise the code in further steps a number of variables should be set.
Step 2: Create an Azure Storage Account and Container
CockroachDB's Change Data Capture feature has the ability to send row level changes to object storage, in this case Azure blob storage. Create a storage account first.
Then a storage container within that storage account.
Now we’ve a destination to send the data to from CockroachDB.
Step 3: Upgrade Azure Blob Storage with Azure Data Lake Storage Gen2 capabilities Validate your storage account by using the following command.
To take advantage of Synapse the storage account needs to be upgraded with Azure Data Lake Storage Gen2 capabilities. Run the command below to upgrade the storage account.
If the validation succeeds, the process completes and no errors appear.
If validation fails, a validation error will appear in the console. For example, the error (IncompatibleValuesForAccountProperties) Values for account properties are incompatible: Versioning Enabled indicates that an incompatible feature (Versioning) is enabled on the account. In this case, you would disable the feature and then start the validation process again.
In some cases, the path to a file named error.json appears in the console. You can open that file to determine why the account did not pass the validation step.
The following JSON indicates that an incompatible feature is enabled on the account. In this case, you would disable the feature and then start the validation process again.
Example Output:
After your account has been successfully validated, start the upgrade by running the following command.
Step 4: Enable Change Data Capture
Change data capture (CDC) provides efficient, distributed, row-level changefeeds into a configurable sink for downstream processing such as reporting, caching, or full-text indexing. In this particular case, we will be configuring the changefeed (CDC) to send data to the above configured storage account in Azure. This storage account has now been configured as a data lake.
Retrieve the storage account keys from Azure
In order to configure CDC we need to obtain the account keys for our storage account which will allow us to authenticate to it.
Run the following command to display your account key.
The output will look like the example below. As it contains some unsupported characters to use within a URL we need to URL-Encode the key for a future step. There are a number of ways you can URL-Encode a string but I found the easiest way was here.
Example Output:
Below is an example of the URL Encoded account.
Configure CockroachDB CDC in Kubernetes
Now the pod is running, connect into the pod running the cockroach sql command.
Now you are connected to the pod with the SQL Client we can configure CDC. First, update the cluster settings kv.rangefeed.enable to be true.
Now that we have enabled the feature we can create our first change feed. This change feed will send all changes to the rides table to and Azure blob which is also an Azure Data Lake.
To generate some changes to the rides table we are for a second time going to exec int the secure pod we created earlier. However, this time we are going to use `cockroach workload movr` perform INSERT, UPDATE and DELETE actions against the table. Remote into the pods with the command below.
The command below will create the schema required for the workload. In this example there is already an SQL user called `craig` with the password `cockroach` and a new database called `movr`. You will need to create this database and user or change the credentials for a user in your CockroachDB cluster.
Once the database and schema are created we can generate some load. The command below will do this.
Step 5: Run a query against Azure Data Lake Gen2 with Synapse
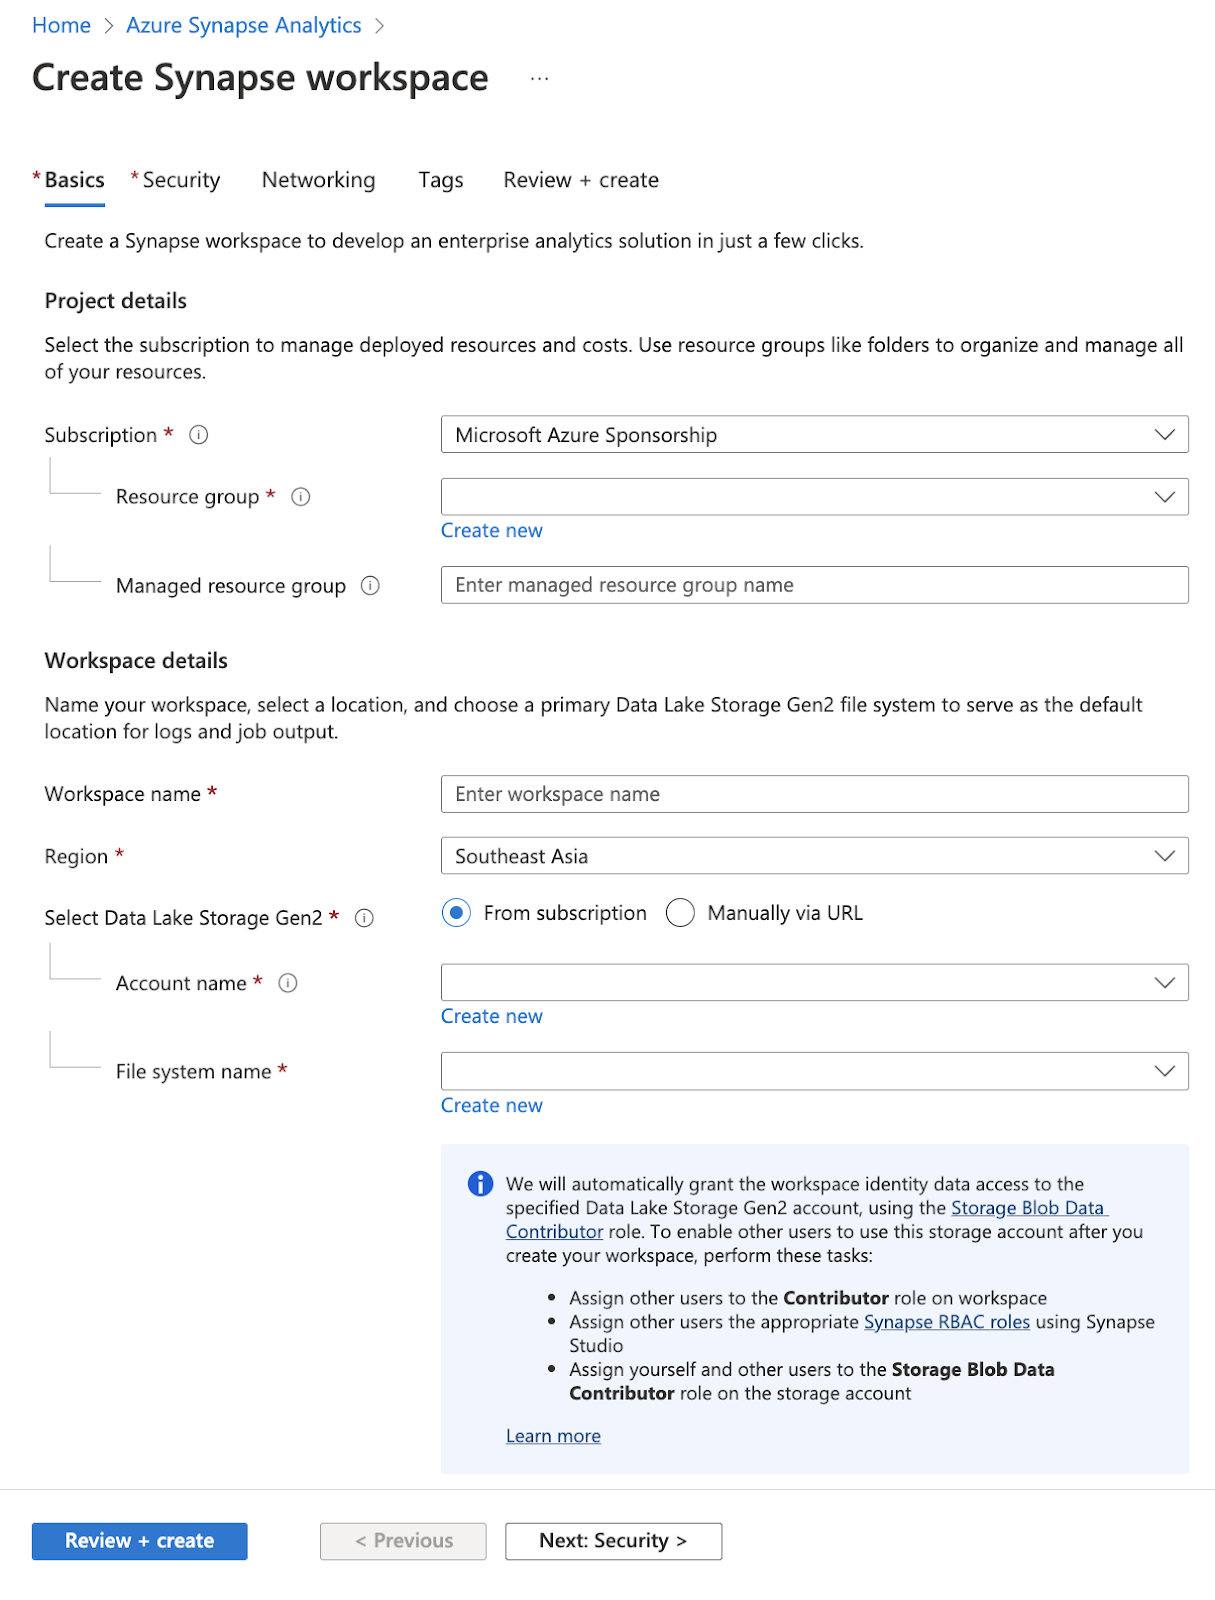
In the Azure Portal create and Synapse workspace. In the search bar at the top and search for Synapse click on the add button and complete wizard that is presented.
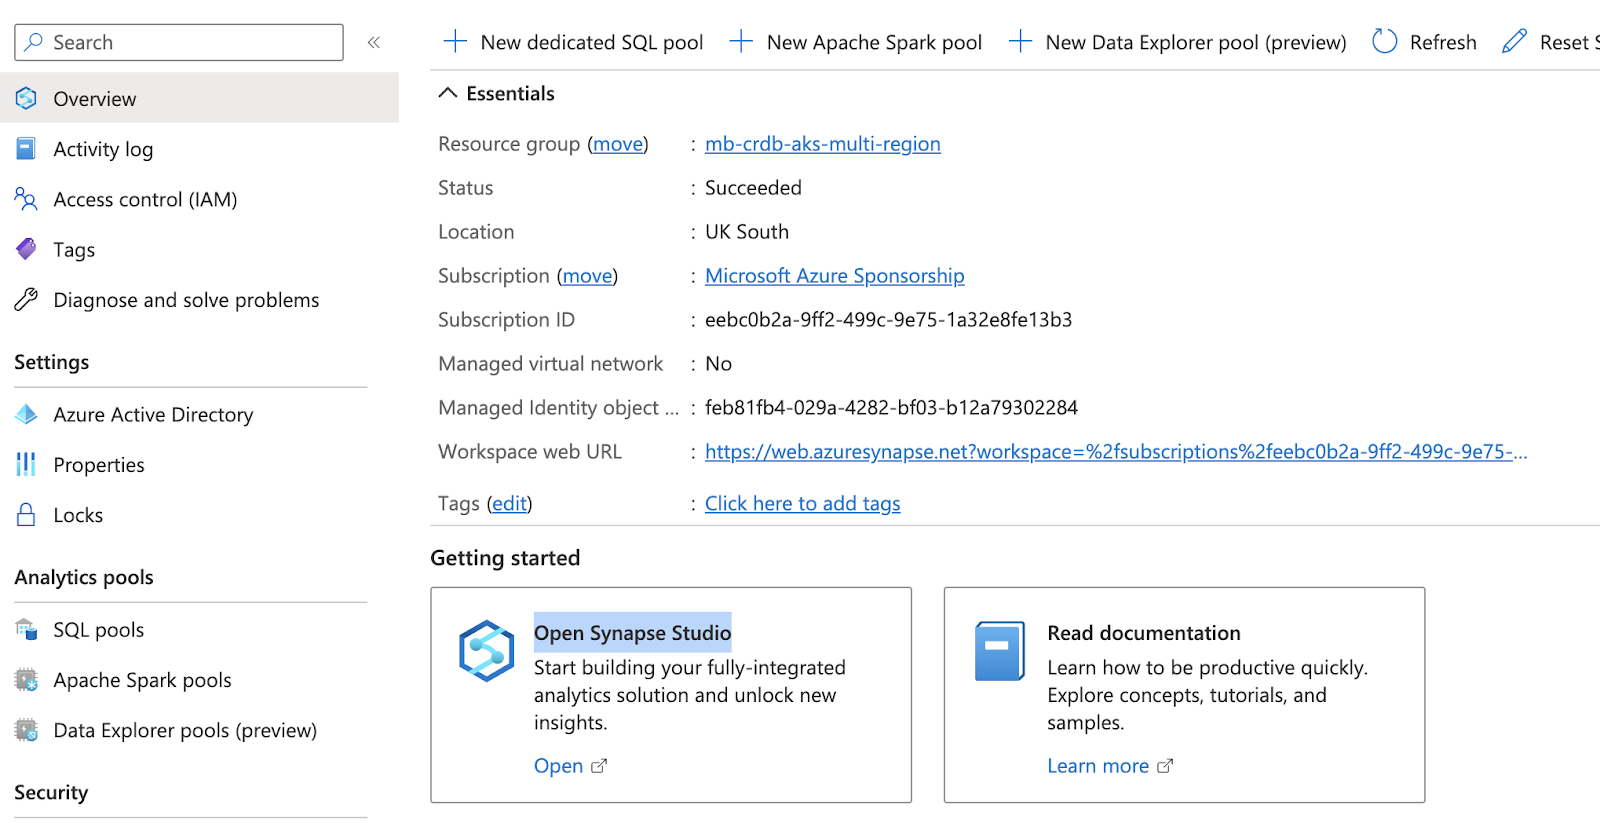
Once created open Open Synapse Studio form the Getting Started tile in the main window.
Once opened it needs to be connected to external storage. This can be done by clicking in Data on the left hand menu and by using the +. Select Connect to external data than complete the wizard to connect the Azure Data Lake.

Synapse is now configured and we can run an example SQL Query. The query below looks at all the available files in the Data Lake and gives us a revenue total per City.
You are able to see the totals in the image below represented by a bar chart.

Final Thoughts
In conclusion, combining analytical tools like Azure Synapse with transactional databases like CockroachDB can have a positive impact for many companies. Real-time data replication is made possible via CockroachDB's Change Data Capture (CDC) capability, making it simple to interface with analytical software like Azure Synapse. While guaranteeing that transactional data is highly available and consistent, this integration allows enterprises to obtain insights and make data-driven choices in real-time. The scalability, resilience, and consistency properties of CockroachDB help ensure that the data is correct and dependable despite heavy loads and failures. CockroachDB's data locality feature also facilitates global deployments and low-latency data access. Generally speaking, firms can gain a competitive edge by using data-driven decisions by combining CockroachDB with analytical tools like Azure Synapse.